How to Build a DIY Ultrasonic Welder at Home?
Building a DIY ultrasonic welder at home is an intriguing project for hobbyists and engineers alike. With growing interest in affordable production tools, ultrasonic welding technology offers a unique method for joining materials through high-frequency vibrations. According to industry reports, the ultrasonic welding market is expected to reach $1.8 billion by 2025, highlighting the demand for innovative welding solutions.
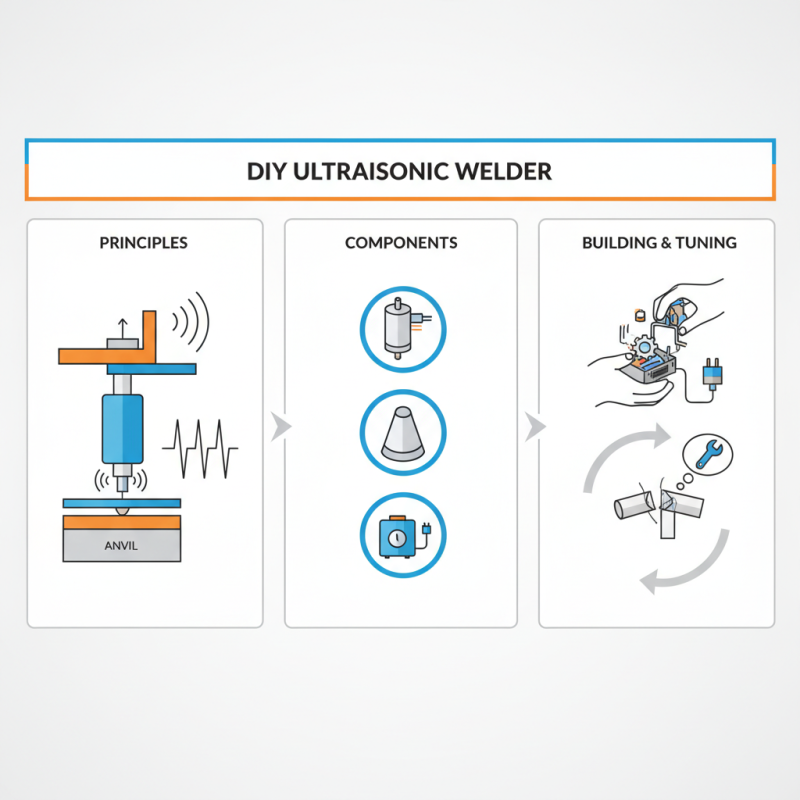
Creating a DIY ultrasonic welder can seem daunting. However, many have successfully tackled this task with the right resources. The process involves understanding the principles of ultrasonic welding and acquiring suitable components. For instance, you might need a transducer, booster, and ultrasonic generator. It is crucial to research each part thoroughly, some may be harder to source than others.
As you embark on building your DIY ultrasonic welder, remember that imperfections may arise. Not all materials will bond perfectly at first. You will likely find yourself reflecting on your design choices and machine tuning. Embracing these challenges can lead to improved outcomes in your welding projects.
Understanding Ultrasonic Welding Principles and Applications
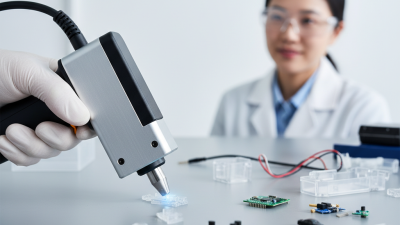
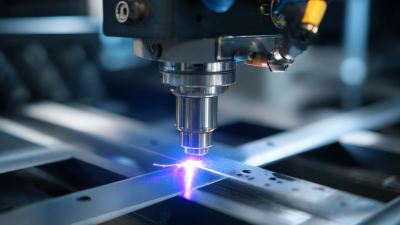
Ultrasonic welding is a fascinating process that uses high-frequency sound waves to join materials. It has numerous applications, especially in plastic manufacturing. The principle is simple: ultrasonic vibrations create localized heat, melting the materials at their interface. This results in a strong bond without the need for adhesives.
When using ultrasonic welding, precision is key. The equipment must generate the correct frequency to achieve effective bonding. A slight deviation can lead to poor joint strength. Many industries rely on this method, including automotive and electronics. During applications, the materials used should be clean and free of contaminants. Any surface imperfection can affect the weld quality.
One often overlooked aspect is the importance of material compatibility. Not all plastics or metals bond well with ultrasonic welding. It can be challenging to determine which combinations work best. Testing different materials may be necessary. Additionally, timing the ultrasonic pulses requires careful attention. Too long or too short can both yield undesirable results. This process invites continuous learning and adaptation, making it an intriguing field for makers and manufacturers alike.
Ultrasonic Welding Power vs. Frequency
This chart demonstrates the relationship between ultrasonic welding frequency and the corresponding power output required. As the frequency increases, the necessary power for effective welding also increases, showcasing the efficiency of ultrasonic welding technology.
Essential Components for a DIY Ultrasonic Welder
Building a DIY ultrasonic welder requires some essential components. You will need a transducer, generator, and a sonotrode.
The transducer converts electrical energy into ultrasonic vibrations. This part is crucial for creating efficient welds.
The generator produces the necessary electrical signal. It should be adjustable to control the frequency. Timing is important, too; even small miscalculations can lead to weak welds or total failures. The sonotrode, the last key component, amplifies the vibrations and delivers them to the material. Carefully choose the material for the sonotrode based on your project needs.
You might face challenges during assembly. Sometimes, connections may not hold, or the generator may malfunction. Patience is vital when troubleshooting.
Testing different configurations can lead to unexpected results. Document your process to reflect on what worked and what didn't. This could help improve future projects.
Step-by-Step Assembly Process for Your Ultrasonic Welder
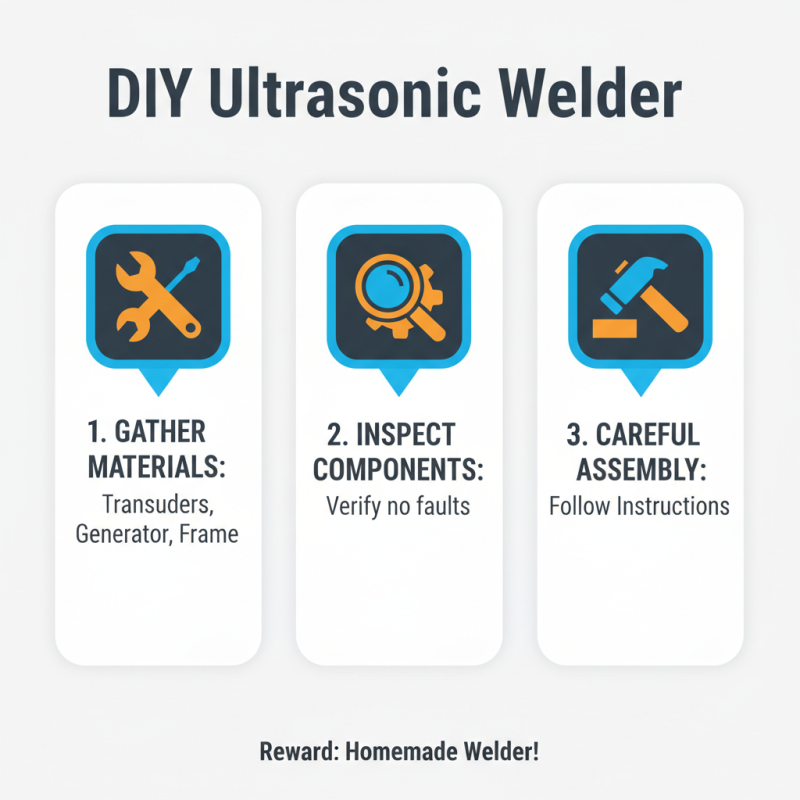
Building a DIY ultrasonic welder at home can be rewarding. This project requires careful assembly and attention to detail. Start by gathering all necessary materials. You’ll need transducers, a generator, and a workable frame. Make sure none of the components are faulty before starting. A careful inspection can save you time later.
When assembling the unit, it’s crucial to follow the wiring diagram closely. Misconnections can lead to poor performance or safety hazards. Take your time during this step. Your connections need to be secure. Insulate them correctly to prevent short circuits. Sometimes, things may not fit as planned. If so, reconsider your layout. Don’t rush this phase.
Tips: Keep your workspace clean to avoid losing important small parts. It’s also wise to label each component during assembly. This will help you if you need to troubleshoot later. Additionally, test each function separately before final assembly. Little errors can escalate into larger problems if not caught early. Reflecting on failures can lead to better designs next time. Embrace imperfections as learning moments.
Safety Precautions When Using an Ultrasonic Welder at Home
When using an ultrasonic welder at home, safety is paramount. The ultrasonic waves can be harmful if not properly managed. Always wear protective eyewear and gloves. These simple measures can prevent serious injuries when working with high-frequency tools. Ensure your workspace is clean and organized. Clutter increases the risk of accidents.
Electricity poses another risk. Make sure to inspect all wiring before use. Faulty connections can lead to shocks. Familiarize yourself with emergency procedures in case something goes wrong. Have a first-aid kit nearby. It might seem excessive, but accidents can occur unexpectedly.
Additionally, be cautious of fumes generated during welding. Proper ventilation is crucial. If you notice a strange smell, stop working immediately. Use a fan or exhaust system to clear the air. It’s important to recognize these signs early. Reflecting on these precautions can enhance your safety experience. Always remain vigilant and respect the power of ultrasonic welding.
Troubleshooting Common Issues in DIY Ultrasonic Welding Projects
When tackling DIY ultrasonic welding, common issues can arise. The welder's frequency may be inconsistent. This can lead to weak welds or burn marks on materials. Checking connections is crucial. Loose or poor connections can disrupt the flow of energy. Make sure that everything is tightly secured.
Another problem might be with the sonotrode or the tool itself. If the surface is damaged or too worn, it won't work effectively. Inspect it regularly for signs of wear. A clean surface is essential for optimal performance. Build-up of residue can lead to failure. Sometimes, replacing the sonotrode might be necessary.
Finally, consider the materials you are using. Different plastics and composites may react differently. Testing with small samples can save time and frustration. If a weld fails, analyze the technique used. Are you applying enough pressure? Did you have the right speed? Reflecting on these questions will help improve future projects.
How to Build a DIY Ultrasonic Welder at Home? - Troubleshooting Common Issues in DIY Ultrasonic Welding Projects
| Component |
Description |
Common Issues |
Troubleshooting Tips |
| Transducer |
Device that converts electrical energy to ultrasonic energy. |
Heating up, no vibrations. |
Check for loose connections, test with a multimeter. |
| Generator |
Supplies the ultrasonic energy to the transducer. |
No output, erratic performance. |
Verify settings, replace defective components. |
| Sonotrode |
The tool that applies ultrasonic energy to the materials being welded. |
Deep scratches, excessive wear. |
Regularly inspect and replace when necessary. |
| Cooling System |
Maintains optimal temperature during operation. |
Overheating, system failure. |
Ensure proper flow, clean filters regularly. |
| Materials |
Types of plastics or metals being welded together. |
Poor bonding, inconsistent quality. |
Test different material combinations, adjust settings. |